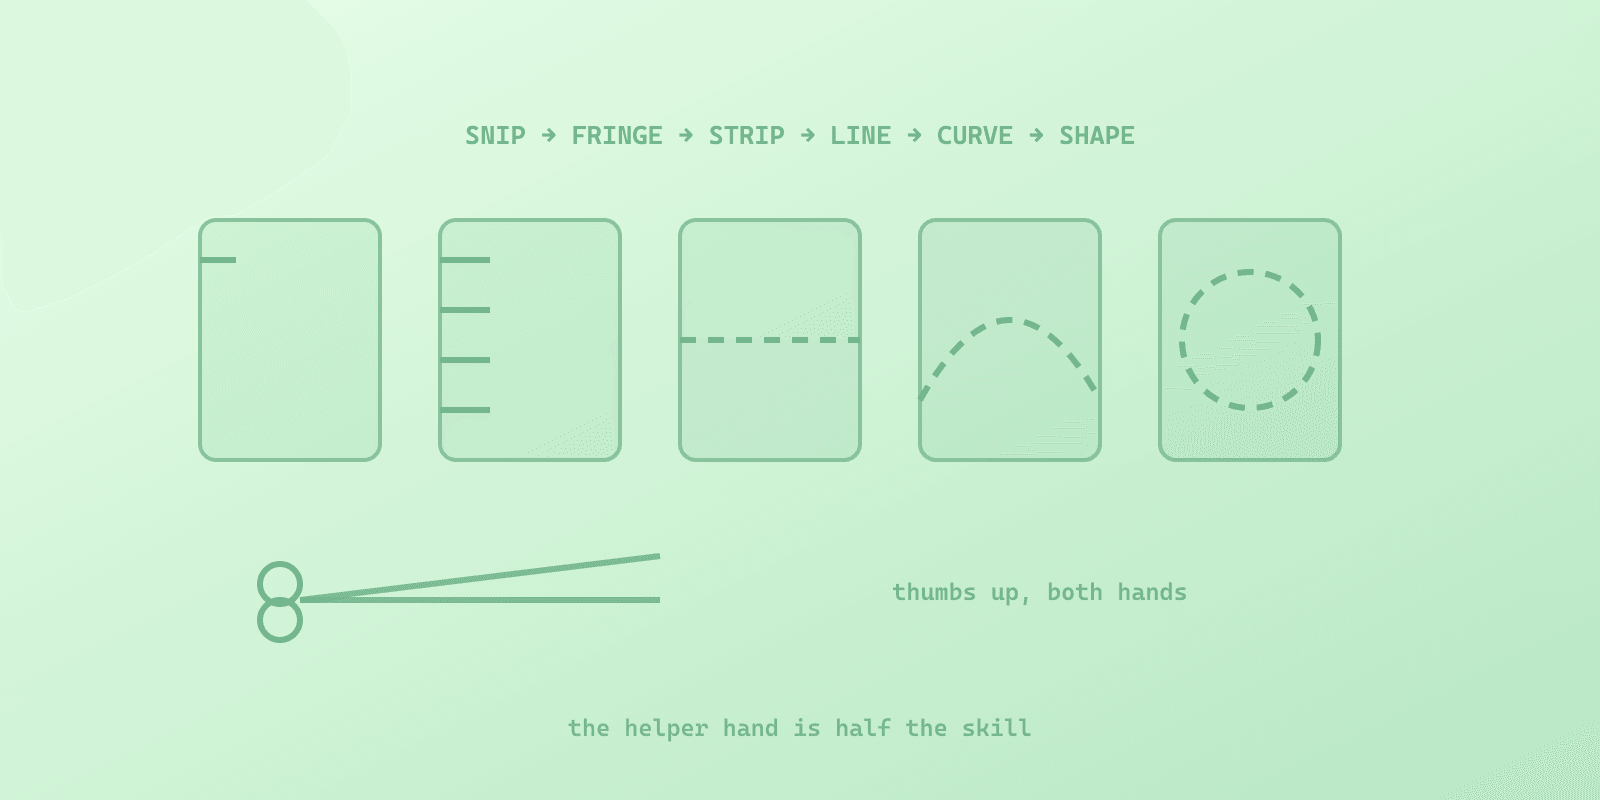
Cutting Activities for Preschoolers: The Scissor Skills Progression From First Snip to Shapes
The developmental sequence of cutting, why the helper hand matters more than the scissor hand, what to do about switching hands, and how to run cutting practice without inventing materials every week.
Key Takeaways
- Cutting develops in a fixed order: snipping, fringe cuts, cutting across a strip, cutting along a straight line, curves, then shapes. Skipping to shapes because they look like the goal produces frustration, not progress.
- The helper hand is half the skill. Turning the paper, holding it taut, and feeding it into the blades is what separates cutting on the line from hacking near it, and it is the half nobody practices deliberately.
- Hand-switching during cutting is normal before hand dominance settles, typically by age 5 to 6. Offer the scissors at midline and let the child choose; do not assign a hand.
- Thumbs up is the one grip rule worth policing early. Both thumbs, scissor hand and helper hand, point at the ceiling; almost every messy-cutting pattern traces back to a rotated wrist.
- The line should get skinnier as skill grows. Wide guide paths let beginners succeed; keeping wide paths too long hides drift that a thinner line would teach the child to correct.
Handing a four-year-old scissors and a page with a thick dashed line on it feels like teaching cutting. Usually it is testing cutting, on a child who has not yet been taught the six things that come before a line.
Cutting is a sequence, the sequence is the same for every child, and almost every scissor struggle traces to a skipped stage or an ignored helper hand.
Cutting has a sequence for the same reason writing does: each step needs something the one before it did not. If you are working on both, the pre-writing skills sequence lays out the writing side in the same way.
The progression, in order
- Snips. Single closures on the edge of stiff paper. Nothing connects; every cut is its own event.
- Fringe. A row of snips along an edge. Still no connecting, but now there is rhythm and a product that looks like something.
- Across a strip. A narrow strip cut in two with one snip, then wider strips needing two or three connected cuts. Connecting cuts is the new skill.
- The straight line. A drawn path across a full sheet, wide at first.
- Curves. The helper hand starts really working, feeding and turning the paper.
- Shapes. Circles, squares, then complex outlines. The scissor hand cuts; the helper hand steers.
Move forward when the current stage is easy and clean, and move back one stage the moment sessions turn into fights. The stages are close together; the frustration of a skipped one is not.
The helper hand is half the skill
Watch a skilled cutter and the scissors barely change direction; the paper does. The non-scissor hand holds the page taut, feeds it into the blades and rotates it through curves. Watch a struggling cutter and the helper hand is usually pinching one corner like a wet sock while the scissor hand chases the line all over the table.
Two fixes. Cue the helper hand explicitly, thumb on top, walking along the edge as the cut advances. And choose materials that give it work: card stock and stiff paper reward a taut hold, while flimsy paper collapses and punishes it. If one idea from this post changes your sessions, make it this one.
Cutting is also one of the best whole-hand strength builders a child gets, which is why it sits beside line tracing and pencil work in any fine motor plan: the same grip strength and bilateral coordination that scissors build show up later at the pencil, including in name writing practice.
Grip: police one thing
Full grip coaching overwhelms small children. The one rule with the highest payoff is thumbs up, both hands. Thumb in the small hole pointing at the ceiling; helper-hand thumb on top of the paper. When cutting goes ragged, the wrist has almost always rotated and taken the blades sideways with it, and "show me your thumbs" repairs it without a lecture.
Hand-switching before age 5 or 6 is not a grip problem; it is undecided dominance plus fatigue. Offer the scissors at midline, let the child choose, and let the choosing settle itself.
What good practice pages control
A cutting page is doing its job when it controls three variables on purpose: the number of connected cuts, the width of the guide path, and the geometry of the path. The path should get skinnier as the child gets better, because a wide path that once enabled success eventually hides the drift a thin line would teach the child to correct.
The quiet fourth variable is whether the cutting makes something. Fringe becomes a crown, a spiral becomes a snake, shapes become parts of a craft. A page that produces an object gets asked for again; a page that produces scraps gets negotiated over. Cards that get used after the cutting work the same way: a free apple picking sequencing sheet has four picture cards to cut out along straight dashed lines, and then the child puts the apple picking trip back in order.
Our free cutting practice worksheets generate staged straight-line, curve and shape pages at the width you choose, and the Cutting Practice Pack sequences the full progression with the fringe and strip stages, the crafts, and data pages for anyone tracking progress toward an IEP goal. For letter-level readiness alongside the hand work, letter recognition activities cover the visual half of early writing while the scissors build the motor half.
What to do on Monday
Put a strip of card stock in front of the child, one snip wide. Watch one cut. Where it lands on the six stages, and what the helper hand did while it happened, is your whole lesson plan for the week.
Need help preparing for YOUR next IEP meeting?
Beacon learns about YOUR child and gives guidance specific to them.
What would Beacon say?
"Help me prep for my IEP meeting"
If you asked Beacon "Help me prep for my IEP meeting" it would pull your child's goals, challenges, and history, and give you the exact questions to ask, red flags to watch for, and what to push back on.

Spectrum Unlocked Editorial Team
Editorial Team
The Spectrum Unlocked editorial team combines lived experience as autism parents with research-backed guidance to create resources families can trust.
Frequently asked questions
- At what age can a child use scissors?
- Most children can snip with supervision around age 2 to 3, cut a paper strip in half around 3, cut along a straight line around 4, and manage curves and simple shapes between 4 and 6. These are wide ranges, and children with fine motor delays travel the same sequence later. The readiness signs that matter more than age: the child can open and close a fist repeatedly, shows interest, and can sit for a short table task. Start with safety scissors and short supervised sessions rather than waiting for a birthday.
- What is the correct scissor grip for a child?
- Thumb in the small hole pointing up, middle finger in the large hole, index finger resting outside the large hole as a rudder, and the last two fingers tucked. The single cue that fixes the most problems is thumbs up: when the thumb rotates sideways or down, the wrist follows, the blades tilt, and the cut wanders. The helper hand mirrors the rule, thumb on top of the paper. Two thumbs at the ceiling is the whole grip lesson in four words.
- Why does my child switch hands while cutting?
- Because hand dominance is often not settled until age 5 or 6, and cutting is tiring, so the fresh hand volunteers. This is normal. Offer scissors at the child's midline and let them pick a hand each time; the dominant hand will win by itself as it consolidates. What is worth noticing is a child who switches mid-task because of fatigue every time, which suggests building hand strength with playdough, clothespins and squeeze toys alongside cutting practice, and a child past 6 with no preference at all, which is worth mentioning to an occupational therapist.
- What should scissor practice start with if a child cannot cut on a line yet?
- Behind the line, in this order: single snips on stiff paper or card, fringe cuts along an edge where every cut is one snip and nothing has to connect, cutting a narrow strip in two where one snip finishes the job, then widening the strip so two and three connected snips are needed. Only then does a drawn straight line earn its place, first as a wide path, then thinner. Playdough snakes and drinking straws make satisfying first materials because they give feedback a flat page cannot.
- Are cutting worksheets worth using?
- Yes, if they are staged and honest about the progression. A good cutting page controls three things: how many connected cuts the task needs, how wide the guide path is, and whether the path is straight, curved or angled. A stack of identical dashed-line pages controls none of them. Staged pages also produce something, a fringe crown, a puzzle, a shape that becomes part of a craft, which turns practice into making rather than drill. Our free cutting practice generator prints staged straight, curve and shape pages, and the full pack sequences them with data pages for teachers who track progress.
- How do I make cutting practice safe for a child who puts everything in their mouth or throws scissors?
- Use true safety scissors that cut paper and nothing else, including plastic-blade and spring-assist models, store scissors out of reach between sessions and treat them as a hand-them-out, collect-them-back material, and run cutting one-on-one until the routine is solid. Spring-assist scissors also help children who cannot yet manage the open phase of the cut, which is usually the harder half. For a child who is not safe with any blade yet, tearing paper along a line builds the same bilateral coordination and is a legitimate stage, not a consolation prize.